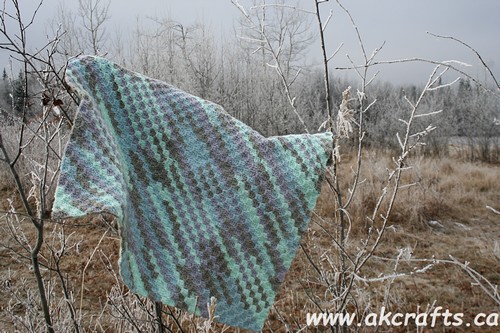
Winter-day Corner to Corner (C2C) Afghan
Now that I looked at so many amazing Corner to Corner blanket, I have to make one, too. My first thought was – omg, how does it work, it looks so difficult
But I have to say it is really easy to make it and it is fun. So when I can do it, everybody else can do it.
I used 6 skeins of Schachenmayr Bravo Color Florence and a 4 mm Hook.
Skill Level: Easy
Abbreviations
ch chain
dc double crochet
ss slip stitch
st stitch
Gauge
9 rows are 4 inch (10 cm)
you have to measure diagonally from your beginning corner)
Final size
26.5 inch x 26.5 inch (67 cm x 67 cm)
Notes
- Please read this pattern all the way through and you will have a better overview before you start your work
- You will start your Corner-to-Corner (C2C) blanket in one corner and your rows will grow diagonally to the other corner
- It is an easy task to make your blanket smaller or bigger. Because this pattern is worked diagonally you have to work your increasing rows until you have reached the width you want. After that you start with your decreasing rows.
- Now let’s estimate the yarn for your blanket. Half of your yarn quantities will be used up before you start with your decreasing rows. But let’s not forget the extra yarn you will need for your border.
- I wrote this pattern in English and using American crochet terms.
- You can use as many or few colors as you like for your blanket.
- You can use your favorite yarn and respective hook for your blanket.
CROCHET PATTERN CORNER-TO-CORNER (C2C)
Increase Rows
Row 1: Start by chaining 6 and work a DC in your 4th chain from your hook. Then work 1 DC in each of your remaining 2 chains and turn – you made your first block
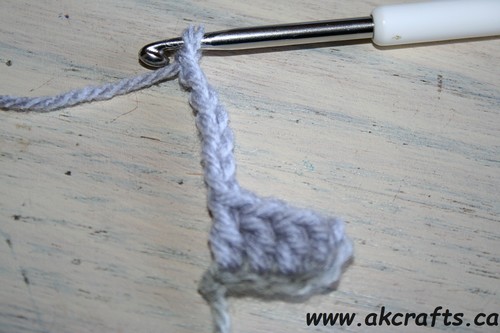
Row 2: chain 6 and work a DC in your 4th chain from your hook. Then work 1 DC in each of your remaining 2 chains and “flip” your previous Row vertically. Now work a SS, ch-3 and 3 DC in your next ch-3 space of your previous row and turn – you made 2 blocks
Row 3: chain 5 and work a DC in your 4th chain from your hook. Then work 1 DC in each of your remaining 2 chains and “flip” your previous Row vertically.
Now work *SS, ch-3 and 3 DC in your next ch-3 space of your previous row;
repeat from * twice and turn – you made 3 blocks
Your blanket will grow by increasing 1 block in each row until you reached the width you want. Now you have to start with decreasing.
Decrease Rows:
Instead of chaining 6 like you did at the end in your increasing rows you only have to turn your work and SS across your first 3 DC
*work SS, ch-3 and 3 DC in your next ch-3 space of your previous row
repeat from * to your last ch-3 space and SS in your last ch-3 space, turn
(do not make a block in your last space)
Repeat this row for your decreasing part of your blanket.
Border
To make a border for this blanket is completely your choice.
I left my blanket without border, because I love it the way it looks.
On the other hand a border would be a nice finishing touch. I think a simple crochet border is all this blanket would really need, but feel free to make any border you like.
Maybe 4 Rounds of single crochet would be nice – so take turns and work 2 or 3 single crochet for every block along your edges. For your corners work a single crochet, ch-2 and a single crochet in your corner stitch.
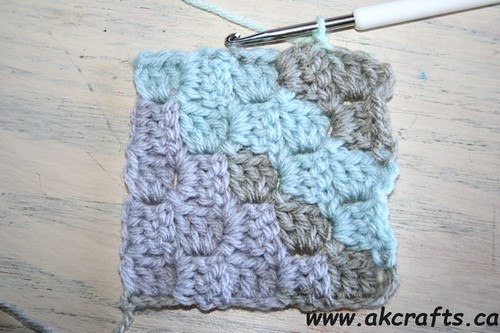
PICTURE TUTORIAL
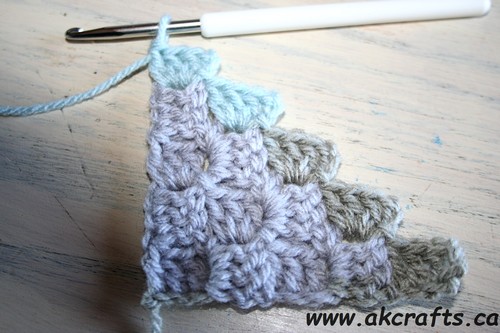
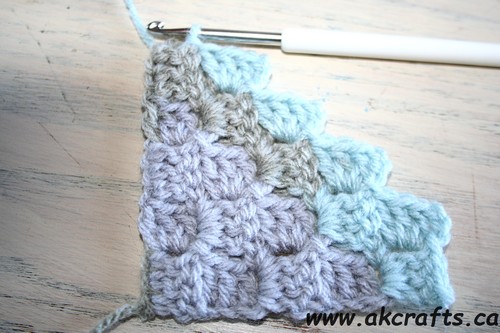
Increasing Rows
Start with chaining 6
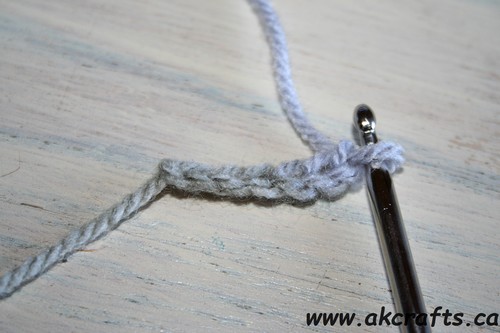
Work a DC in your 4th chain of your hook and 1 DC in each of your remaining 2 chains (your first block)
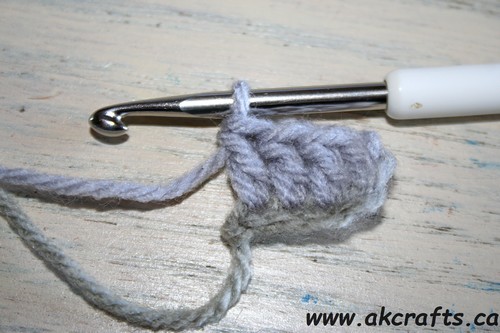
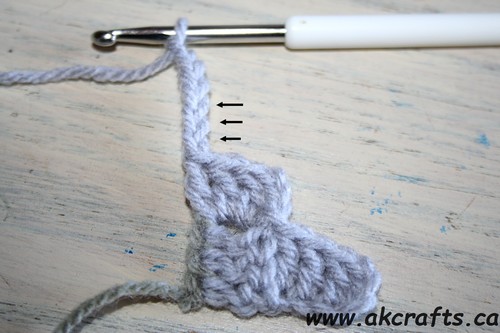
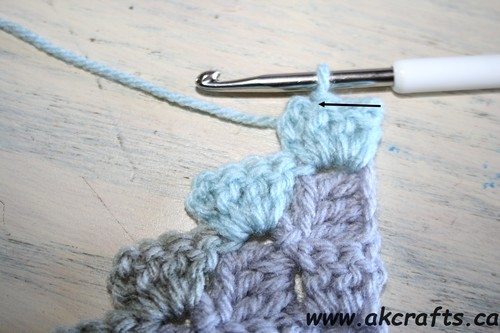
chain 6
work a DC in your 4th chain of your hook and 1 DC in each of your remaining 2 chains.
Now take your block from your previous row and flip/turn it over. (Arrow)
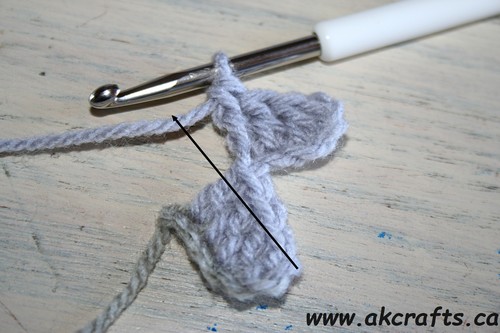
Now your ch-3 space is at the same level as your hook.
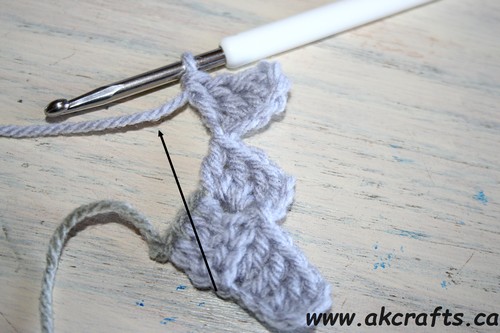
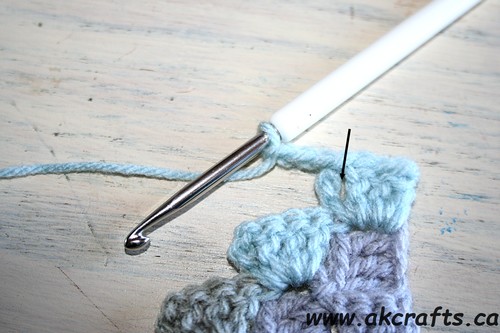
Work a SS into your ch-3 space
chain 3 and work 3 DC in your next ch-3 space of your previous row (block made)
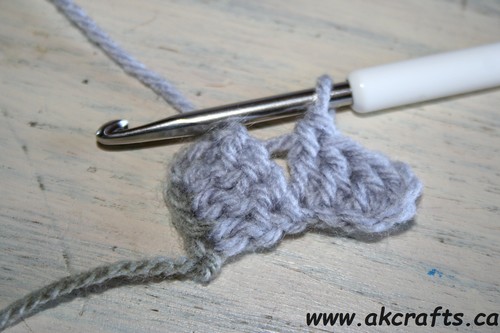
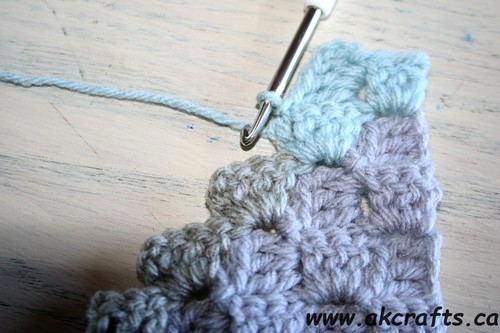
So let’s start over again for your next row.
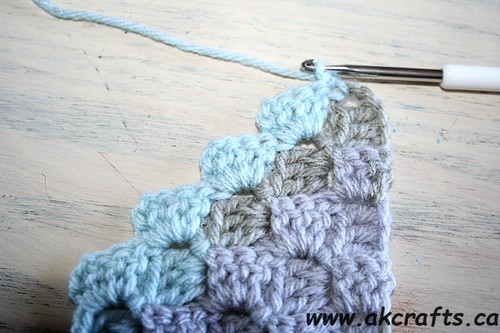
Chain 6 and work a DC in your 4th chain from your hook. Then work 1 DC in each of your remaining 2 chain. (Arrows)
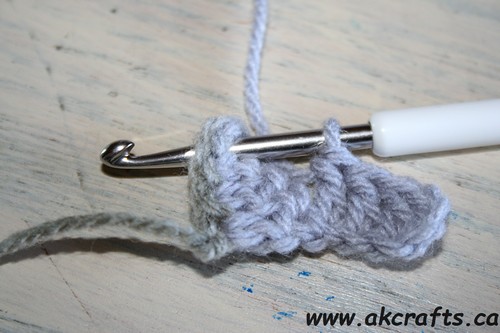
Now you have to flip/turn your previous rows up. (Arrow)
Work your next block into your ch-3 space (Arrow)
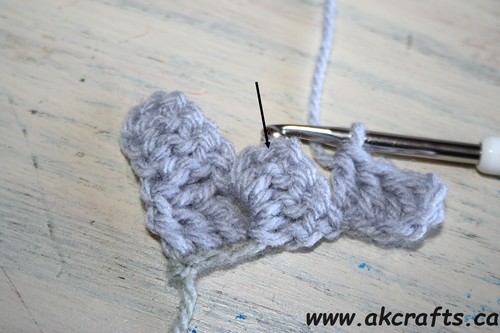
Work a SS, ch-3 and 3 DC in your ch-3 space.
Then SS to your next ch-3 space.
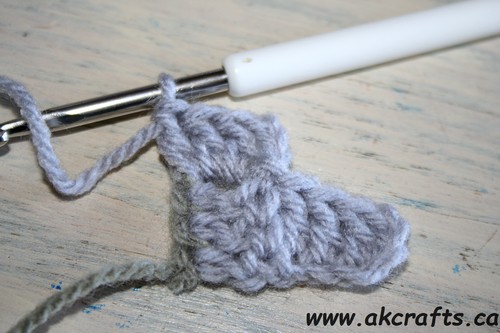
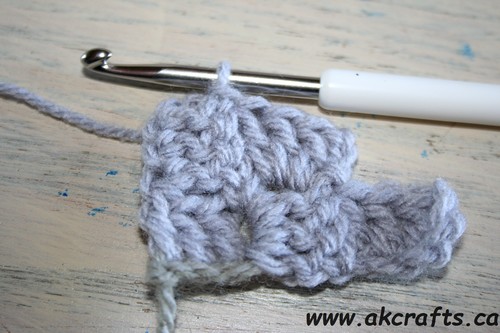
Keep building your blocks … until you have reached the width of your blanket you want.
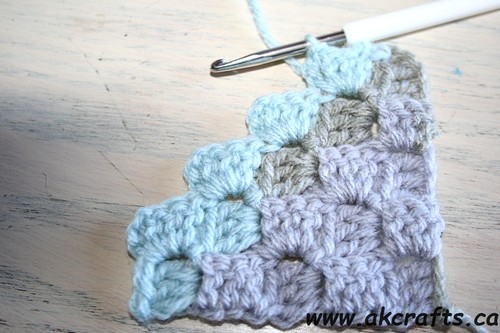
Decreasing rows
When you at the middle of your blanket you start to decreasing your rows.
Finish your final block of your row and let us start decreasing.
Turn your work and work a SS in each of your DC
Then a SS into your ch-3 space (Arrow)
and start a new block with a ch-3.
Work a 3 DC in the same ch-3 space and SS to your next ch-3 space. – You made your first block in your decreasing row.
Keep going by working another block with a ch-3 and then 3 DC in your next ch-3 space.
At the end of your row SS to your last ch-3 space.
AND turn
Work you SS’s along your 3 DC’s and SS to your next ch-3 space.
Working your blocks to the end of your row.
Continue in this matter …..
until you have only one more block left.
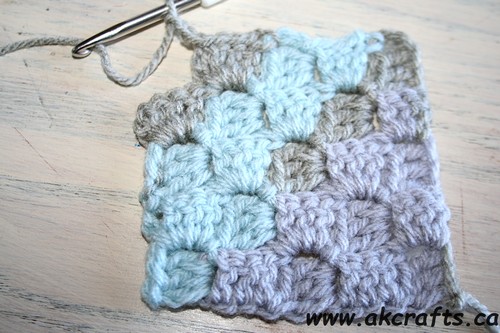
Work your last block and SS to your last ch-3 space. Fasten off!
You mastered your C2C blanket 🙂
